The application allows a user to rename an Autodesk® Inventor® project including all parts, sub-assemblies & drawings.
It also updates all referenced documents. Application provides complex criteria to rename strings, prefix, suffix, excludes, folder rename etc.
Tool also enables manual renaming of individual files. Once string replace conditions are provided by user, it’s a single click process for user to rename whole project into new one.
This is an independent application working with Inventor®. User can launch it from desktop icon or program files.
Recommended – Close Inventor® before running this application. It is also advisable to rename Healthy project / “Pack and Go” projects only. Also keep a backup of the project being renamed
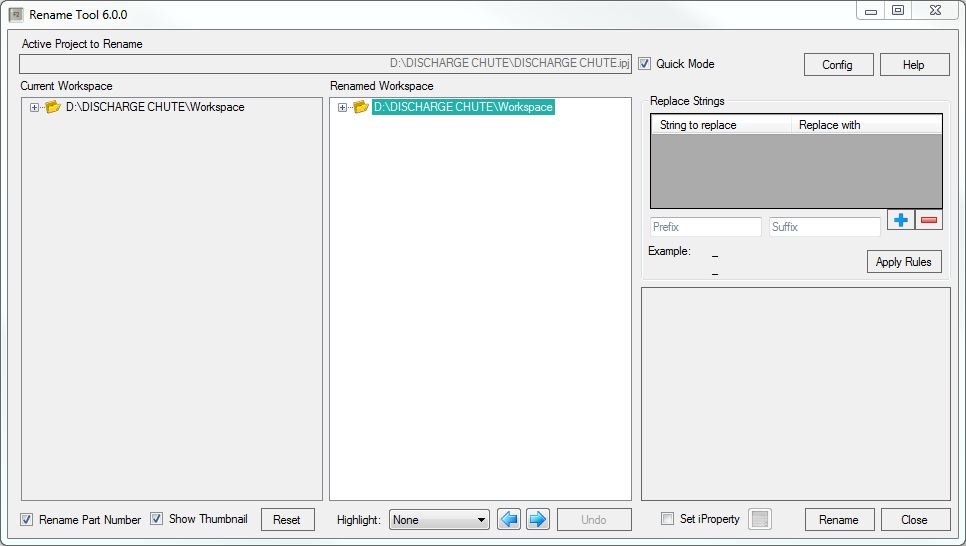
The application renames all parts, assemblies & drawings along with referenced documents based on string replace criteria specified by user. Application provides complex criteria to rename strings, and manage the files
User also have option to update part numbers based on same criteria.
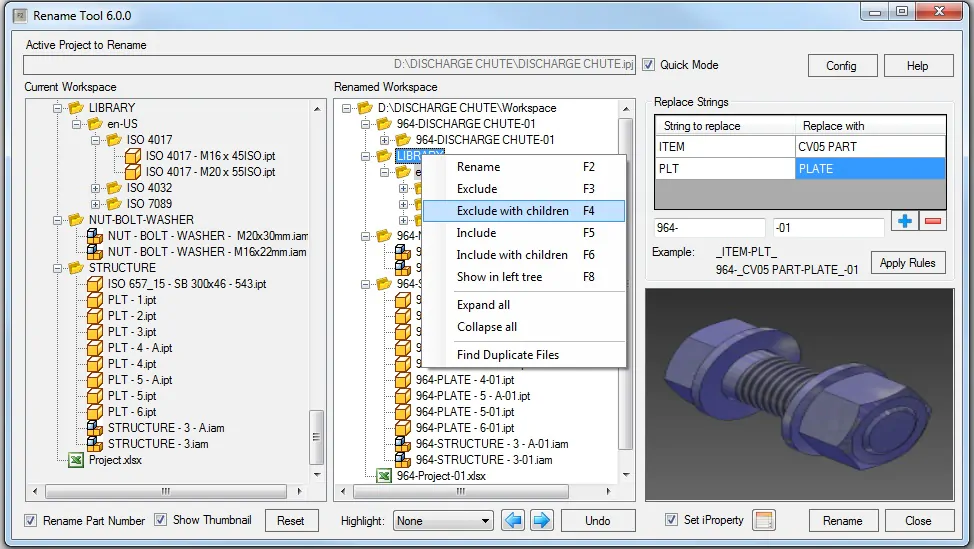
Main Window of application is shown in following figure. Purpose of various fields is mentioned below
Active Project to Rename: Indicates the location of active project. This is the project whose workspace will be available to rename. Before starting the tool user should active the project in Inventor®.
Current Workspace: this is the file structure on currently selected folder
Renamed Workspace: This is the file structure to be created after renaming. Once the rename rules are applied, it will be seen in this structure, but this structure will only be created after renaming action is completed.
Replace Strings: In this section user can define various rules to replace strings. All the strings defines in left side of table column will be replaced with right column. User can also specify Prefix and Suffix to be added in the names of files
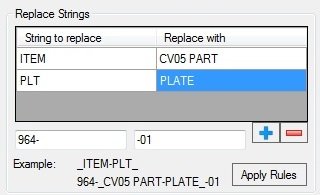
Thumbnail: Displays the thumbnail of currently selected node
Quick Mode: This mode executes multiple times faster than normal mode. But “Display Name” in drawings cannot be set. This will be set automatically on subsequent open-close operations, but the immediate output will not show the new “Display Name”. So if this is not of critical importance to user, he can continue with quick mode
Undo: User can rename nodes manually or with auto replace. To cancel the last action, user can use undo button.
Rename Part Number: If this checkbox is checked, the part number will be replaces with the latest name of file.
Show thumbnail: If this checkbox is checked, user can see thumbnail of selected node in thumbnail window. But this can make the application slow sometimes. In that case user can uncheck this checkbox
Reset All: this button will reset this dialog to original state by removing all the changes user has created.
Set iProperty: User can launch iproperty dialog by check set iproperty option.

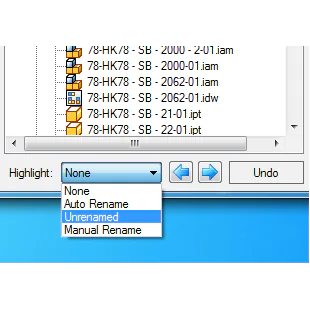
Highlight: This combo box allows user to highlight the nodes which were modified by “Auto rename” (by replace rules) or “Manual rename” or which are “Unrenamed”

Next-Previous Buttons: These buttons navigate user from one node to another node. If a Highlight selection is active, these buttons will navigate between highlighted nodes, so that its easier for user to find next nodes
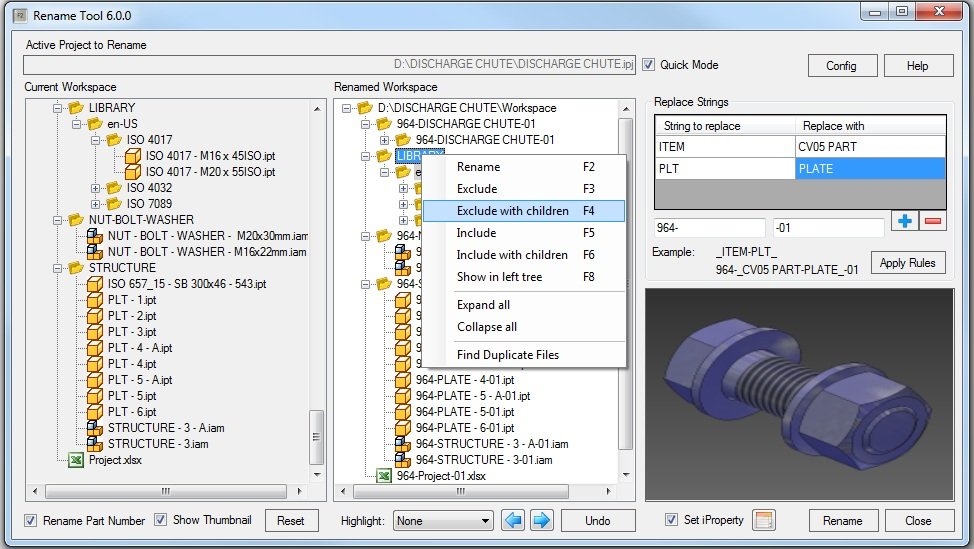
Context Menu: The renamed tree contains a context menu for various actions. It also displays the shortcut key of the action (Please note that all the context menu actions should be performed after the replace rules are applied. Applying the replace rules will remove all the actions performed by context menu items on the tree)

Rename: renames node manually
Exclude: excludes the selected node from auto replace action
Exclude with children: excludes selected folder and all its children from auto replace action
Include: includes the excluded node
Include with children: includes selected node and all its children if they were excluded
Show in left tree: selects corresponding node to the selected node in left tree
Expand all: expands all the nodes in tree
Collapse all: collapses all the nodes in tree
Find Duplicate Files: This action will search for any files with same name inside the workspace. If there are multiple files with same name, the Inventor® may get incorrect reference file. Hence user can verify duplicate files in dialog and can rename them if necessary.
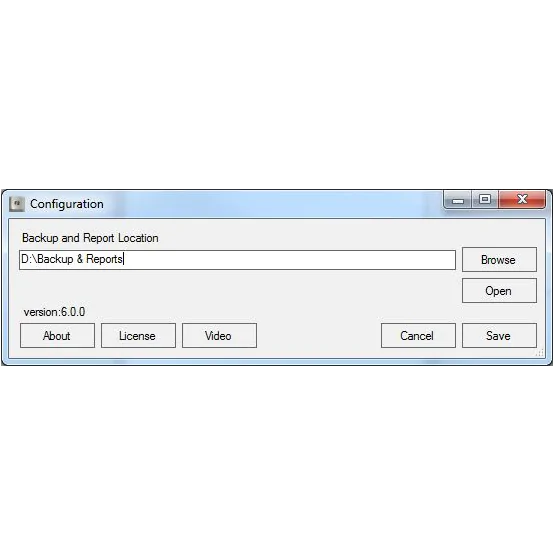
Following image displays the configuration window. User can set the default location of the report and backup in this dialog. The tool will take backup of workspace folder in specified location. In case of any issues in the renamed project, user can use this backup.

It will set Properties to all Parts and sub-assemblies of its higher level assembly.
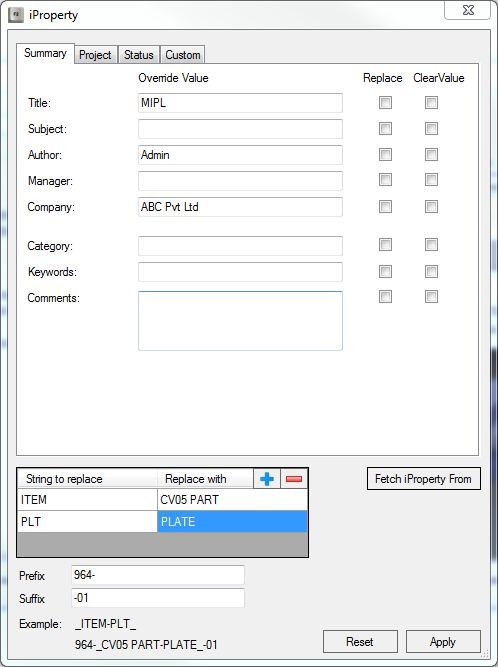
There are three Options to set iProperty. User can select only one option at a time.
Override Value: In this section old Value is Override by Entered value.
Replace Strings: In this section user can define various rules to replace strings. All the strings defines in left side of table column will be replaced with right column. User can also specify Prefix and Suffix to be added in the names of files
Clear Value: In this section it will clear value of property.
Reset : this button will reset this dialog to original state by removing all the changes user has created.
Apply : this button will store all changes to UI and set it to documents on rename process.
Fetch iProperty From : this button will fetch iproperty of selected assembly file and set it to UI.
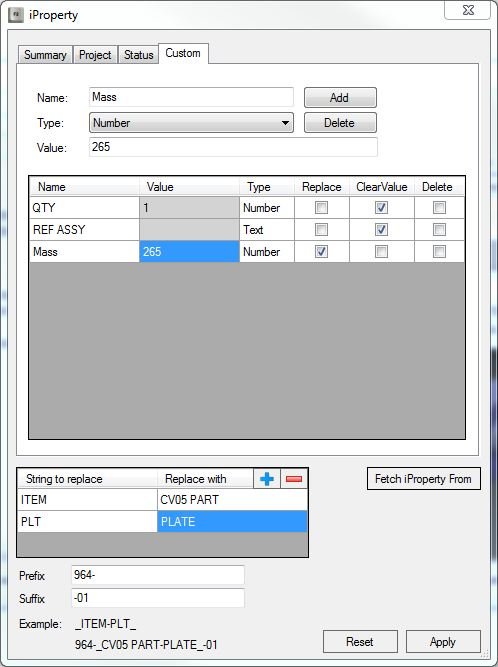
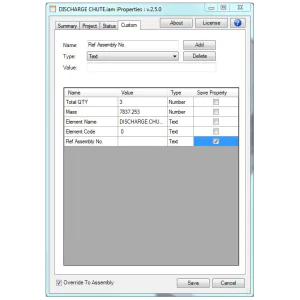
User Can also add Custom Property.
Once all the data is filled, clicking on “Rename” button starts rename action. First it will create backup of current project. Then it will rename directory structure, and then will relink all the files for the changed references. (Stopping rename action in between will change links in some files and keep some files unchanged. It may create the project with broken links). The dialog will display approximate time estimate of the action
At the end of renaming the report will be generated. The report includes the list of files which failed due to certain error. While the application renames the files, it also changes the references to all the files. Hence for a file which is renames, all the files referencing it, will be set with this new reference.






 Active Project to Rename: Indicates the location of active project. This is the project whose workspace will be available to rename. Before starting the tool user should active the project in Inventor®.
Current Workspace: this is the file structure on currently selected folder
Renamed Workspace: This is the file structure to be created after renaming. Once the rename rules are applied, it will be seen in this structure, but this structure will only be created after renaming action is completed.
Replace Strings: In this section user can define various rules to replace strings. All the strings defines in left side of table column will be replaced with right column. User can also specify Prefix and Suffix to be added in the names of files
 Thumbnail: Displays the thumbnail of currently selected node
Quick Mode: This mode executes multiple times faster than normal mode. But “Display Name” in drawings cannot be set. This will be set automatically on subsequent open-close operations, but the immediate output will not show the new “Display Name”. So if this is not of critical importance to user, he can continue with quick mode
Undo: User can rename nodes manually or with auto replace. To cancel the last action, user can use undo button.
Rename Part Number: If this checkbox is checked, the part number will be replaces with the latest name of file.
Show thumbnail: If this checkbox is checked, user can see thumbnail of selected node in thumbnail window. But this can make the application slow sometimes. In that case user can uncheck this checkbox
Reset All: this button will reset this dialog to original state by removing all the changes user has created.
Set iProperty: User can launch iproperty dialog by check set iproperty option.
 Next-Previous Buttons: These buttons navigate user from one node to another node. If a Highlight selection is active, these buttons will navigate between highlighted nodes, so that its easier for user to find next nodes
Context Menu: The renamed tree contains a context menu for various actions. It also displays the shortcut key of the action (Please note that all the context menu actions should be performed after the replace rules are applied. Applying the replace rules will remove all the actions performed by context menu items on the tree)
 Rename: renames node manually
Exclude: excludes the selected node from auto replace action
Exclude with children: excludes selected folder and all its children from auto replace action
Include: includes the excluded node
Include with children: includes selected node and all its children if they were excluded
Show in left tree: selects corresponding node to the selected node in left tree
Expand all: expands all the nodes in tree
Collapse all: collapses all the nodes in tree
Find Duplicate Files: This action will search for any files with same name inside the workspace. If there are multiple files with same name, the Inventor® may get incorrect reference file. Hence user can verify duplicate files in dialog and can rename them if necessary.
 There are three Options to set iProperty. User can select only one option at a time.
Override Value: In this section old Value is Override by Entered value.
Replace Strings: In this section user can define various rules to replace strings. All the strings defines in left side of table column will be replaced with right column. User can also specify Prefix and Suffix to be added in the names of files
Clear Value: In this section it will clear value of property.
Reset : this button will reset this dialog to original state by removing all the changes user has created.
Apply : this button will store all changes to UI and set it to documents on rename process.
Fetch iProperty From : this button will fetch iproperty of selected assembly file and set it to UI.
 User Can also add Custom Property.




Reviews
There are no reviews yet.